- MetalinkWear.com
- LoneStarChemical.com
- Employment
- Contact Us
-
Knowledge Base
- Bearing, Bushing, and Seal Fits Repair
- Centrifugal Pump Coating
- Chutes and Exhauster Fan Repair
- Cobbles prevention slippage reduction
- Cooling Tower Distribution Pipe Repair
- Cracked Engine Block Repair
- Flange Repair
- Flat Back Elbow Repair
- Heat Exchanger Repair and Coating
- Keyway Repair
- MSDS
- Pipe and Leak Repair
- Process Cyclone Repair
- Pump Housing Crack Repair
- Pump Impeller Repair
- Pump Volute Repair
- River Discharge Pump Maintenance
- Scored Hydraulic Ram Repair
- Shaft Repair
- Spline Shaft Repair
- Split Case Housing Repair
- Stripped Thread Repair
- Surface Preparation for Polymer Application
- TSA Surface Preparation and Application
- Tube Sheet Repair
- Valve Seat Repair
- What is TSA?
- MSDS
Surface Preparation for Polymer Application
Introduction
Metalink products have been and are continually developed for the industrial community. They have been proven durable and compatible with the harsh conditions that are present in such environments; however, the overall success and longevity of any adhesion or coating application is strongly affected by a few important factors. This section is devoted to giving the applicator a good working knowledge of how to properly use Metalink products. If, after reading this material, you have any questions, please call our technical hotline at 1-800-721-2448.
Temperature
Before mixing two part epoxies, ambient temperature must be taken into consideration. Ideal application temperature range is between 70°F and 100°F. Hotter temperature accelerates the cure time and reduces the working time. Colder temperatures slow the cure and, when below 50°F, will actually stop the process. Therefore, whenever the product has been stored in an ambient temperature of 60°F or less, preheat the base (resin) portion of the polymer to approximately 100°F by inserting the sealed jar in hot tap water and letting stand for an hour or so. (Do not preheat the activator portion, as this will greatly reduce the pot life or working time.) If the substrate temperature is also below 60°F, it can be raised using heat lamps.
Mixing
All kits come with pre-measured amounts in the containers. If a whole unit is to be used, simply mix all of the base with all of the activator of that unit. If lesser amounts are desired, you can mix proportionately. While this can be done by weight or by volume, it is much easier to mix by volume. To mix by volume, break down each component (by eye) into equal size parts. For instance, if you are mixing a compound with a two to one ration, make a round pile of base material and then divide it in half. Then match that half with an equal part of a reactor and then mix until a uniform color is obtained (no streaks).
Application
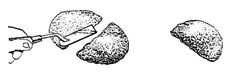
Always apply a very thin coating of the product using firm pressure on the applicator tool. This allows thorough "wetting" of the polymer on the surface. Immediately proceed to apply the remaining polymer with a troweling action in order to prevent air bubbles.
Masking and Release Agents
To protect any area which you do not wish the polymer to adhere to, simply coat with ML900 Silicone Lubricant and Release Agent™. This is particularly helpful for gasket surfaces and threads. A smooth surface may be obtained on most trowelable compounds by waiting for the product to cure slightly and then rubbing the surface with soapy water.
1) Clean the area to be repaired with Metal Prep II™ to remove loose grease, grime, and other contaminants.
2) Remove any remaining rust, dirt, paint, or other surface contaminants and roughen the surface through grit blasting, grinding, wire brushing, filling, or machining.
3) Porous metals (castiron,aluminum,etc.)that have been exposed to light oils may require steam cleaning to assure application surface is contaminant free.
4) Degrease area thoroughly once more with Metal Prep II™.
5) Once surface is prepared, polymer application should take place within 4 to 8 hours. In areas of high humidity, rapid surface oxidation isaconcern. To help prevent this from occurring, heat the application surface to about 100°F immediately following all other surface preparation steps.Apply polymer product as soon as possible.
Concrete
Note: For all concrete epoxy applications, new concrete must have cured at least 28 days.
1) Remove fins, protrusions, or loose material by mechanical means (i.e. needle scaler, chipping hammer, etc.).
2) Sweep the surface of loose material with a stiff bristle brush, or vacuum with a heavy-duty industrial vacuum.
3) Scrape off heavy deposits of oil or grease if necessary.
4) Using a solution of TNT Degreaser ™, remove other surface contaminants by working the solution into the surface, letting stand for 10-15 minutes, then washing off with clean water. Repeat washing untilall degreasing solution has been removed; usually when water stops beading up on surface. (Note: Lighter oils may penetrate a concrete floor to a depth of several inches. In this case, the oils must be removed by steam cleaning if possible, or the contaminated concrete can be chipped out.
5) Abrade surface using one of three methods
a. Abrasive blasting
b. Acid etching
c. Rotary impact, vertical impact or circular grinding equipment.
6) Once surface has been cleaned, abraded, and all loose material removed, surface must be allowed to dry completely if degreased and/or acid etched.
7) After drying, surface is now ready for application. Follow instructions on individual product labels or mixing and application.
Concrete Abrading Alternatives
Each method has its advantages and disadvantages. All require thorough replanning and care in application. The choice of method used will depend on condition of the concrete and the job site. Instructions for each method are covered in the following section.
Abrasive Blasting
1) Be sure that the air stream is free of oil. To verify, direct the air flow on to a sheet of clean, white blotter paper for 30 seconds. Examine the paper for stains.
2) Dryblast. Avoid over blasting as this will remove too much cement substrate.
3) Blast enough to achieve a sound surface, free of laitance, glaze, concrete curing compounds, or form release agents.Surface should have the appearance of medium to coarse sandpaper.
4) Thoroughly sweep or vacuum all loose material. (Note: if application location makes dry blasting impossible, even with containment, wet or vacuum blasting may be used in the same manner.
Acid Etching
Note 1: Acid etching will not be effective on concrete that has been treated with a curing compound, curing membrane, floor hardener, or is contaminated with a form release agent.
Note2: Muriatic acid is the most common etchant. Its vapors are corrosive, so it cannot be used in areas with delicate equipment or in the presence of stainless steel. Citric, sulfamic, and phosphoric acid vapors are less corrosive but their etching is slower. Also, Muriatic acid is equally dangerous to applicators. The other acids are safer; however, all require the use of protective clothing. Appropriate respiratory protection, and good ventilation. Follow all directions on acid container and product Material Safety Data Sheets.
Note3: Etching is not effective on vertical or overhead surfaces.
Note4: Always add acid to water.
1) Remove or mask any metal fixtures or inserts that will be attacked by acids.
2) Prepare a 15% solution of muriatic acid by mixing a one to one ratio of 20 (full strength acid and water. Use one gallon of solution per 50 to 70 square feet.
3) Pre-wet floor with water. Remove any free standing water.
4) Apply acid solution.
5) Spread acid solution with a stiff bristle brush or broom. Freshly applied acid will bubble on the concrete surface. Bubbling should be uniform over the entire surface. (Lack of uniformity indicates the presence of oil, grease, or some in compatible surface treatment. These areas must be cleaned or stripped for the acid to work properly.
6) Allow to stand for 2 or 3minutes,or untilbubblingsubsides.
7) Immediately rinse the floor thoroughly to remove any salts formed. This can be done using a solution of 2 cups of ammonia to 5 gallons of water. This will neutralize the acid and wash away the salts. Rinse completely with water as necessary.
8) Repeat steps 4 through 7 as many times as necessary to obtain a surface which has the appearance of medium to coarse sandpaper.
9) Make final rinse with fresh, potable water as many times as necessary until pH is satisfactory.This can be determined by checking pH of rinse water before rinse, then checking run off after rinse. Runoff pH should not be more than 1 point lower or 2 points higher than rinse water.
10) Dispose of waste water and contaminants in accordance with federal, state and local regulations.
Mechanical Abrading
Note 1:Power tools can cause sparking. Do not use in areas that present an explosion hazard. Wear heavy protective clothing and goggles to guard against flying debris. Use hearing protection and follow all recommended safety precautions.
1) Use rotary impact, vertical impactor circular grinding equipment. Determine in advance which tool will produce the correct profile without damaging the surface.
2) Remove sufficient material to produce a surface free of laitance, glaze, concrete curing compounds, or form release agents. Surface should have the appearance of medium to coarse sandpaper.
3) Thoroughly sweep or vacuum all loose material.
|
|
SUBSTRATE CLEANING & ETCHING ABRASION |
PRIMERS REQUIRED |
RUBBER |
METAL |
GLASS |
|
BUTADIENE RUBBER |
X |
X |
X |
|
|
|
CONCRETE |
X |
|
|
|
|
|
GLASS |
CLEAN ONLY |
|
|
|
X |
|
METAL |
X |
|
|
X |
|
|
NATURAL RUBBER |
X |
X |
X |
|
|
|
NEOPRENE |
X |
|
X |
|
|
|
NITRILE |
X |
|
|
|
|
|
PLASTIC |
PLEASE CALL FOR RECOMMENDATION |
||||
|
PVC |
X |
|
|
|
|
|
SBR |
X |
X |
X |
|
|
|
THER. PLST. URETHANE |
X |
|
|
|
|
|
FIBERGLASS |
X |
|
|
|
|
Comments
No posts found