- MetalinkWear.com
- LoneStarChemical.com
- Employment
- Contact Us
-
Knowledge Base
- Bearing, Bushing, and Seal Fits Repair
- Centrifugal Pump Coating
- Chutes and Exhauster Fan Repair
- Cobbles prevention slippage reduction
- Cooling Tower Distribution Pipe Repair
- Cracked Engine Block Repair
- Flange Repair
- Flat Back Elbow Repair
- Heat Exchanger Repair and Coating
- Keyway Repair
- MSDS
- Pipe and Leak Repair
- Process Cyclone Repair
- Pump Housing Crack Repair
- Pump Impeller Repair
- Pump Volute Repair
- River Discharge Pump Maintenance
- Scored Hydraulic Ram Repair
- Shaft Repair
- Spline Shaft Repair
- Split Case Housing Repair
- Stripped Thread Repair
- Surface Preparation for Polymer Application
- TSA Surface Preparation and Application
- Tube Sheet Repair
- Valve Seat Repair
- What is TSA?
- MSDS
Flange Repair
Severe Pitting/Corrosion – One Side
Severe Pitting/Corrosion – Both Sides
Flanges that have a small cut or gouge may be repaired in the following manner:
1) Prepare repair area according to Metals Preparation Guide. Afterwards, degrease surface thoroughly with Metal Prep II™.
2) Mix a small amount of Steelstick™ according to instructions. Force the material well into the cavity, and allow a slight protrusion above the face of the flange. (Fig. 1) 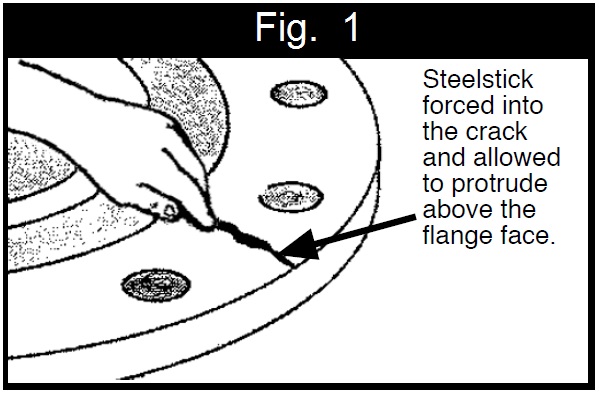
3) After Steelstick™ has set, (typically 15 - 20 minutes), sand the surface smooth using 400 to 600 grit wet cut abrasive. (Fig. 2)
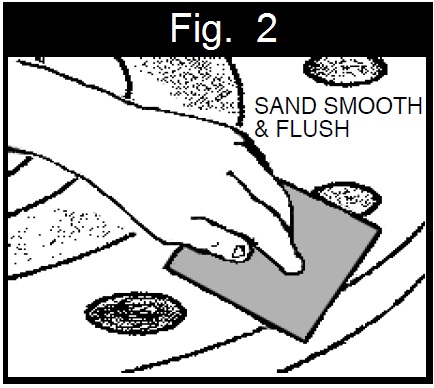
4) Flange is now ready to return to surface.
Severe Pitting/Corrosion -One Side
1) Prepare surface of pitted flange according to the Metals Preparation Guide. Thoroughly clean and degrease with Metal Prep II™.
2) Apply ML900 Silicone Lubricant & Release Agent to surface of the good or new flange. Also apply it to the assembly bolts and then insert them into the flange holes.
3) Apply ML400 Machinable Repair™ to the surface of the pitted flange at least 1/16" thick. (Fig.3)
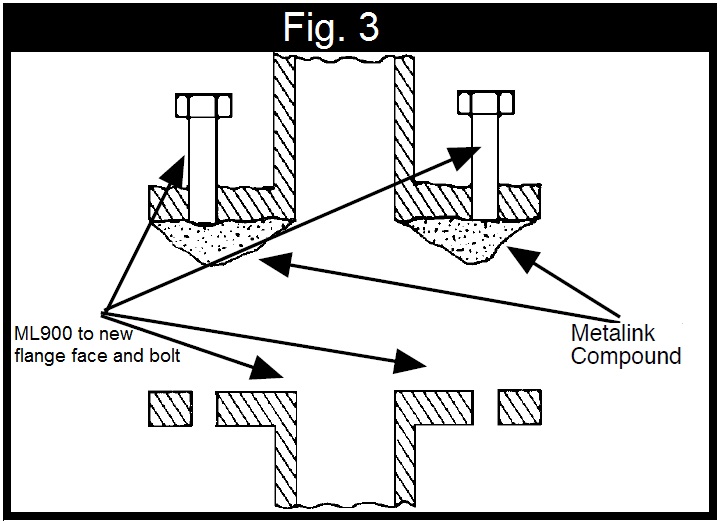
4) Assemble both flanges and bolt together. Wipe off excess material and allow curing fully. (Fig. 4)
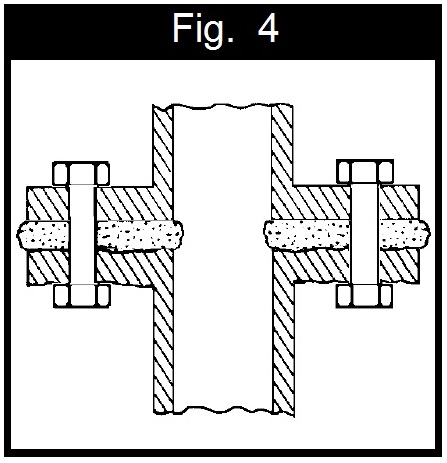
5) Disassemble and clean/grind around bolt holes. Flange is now ready to return to service.
NOTE: This repair should not be attempted on flanges with operation temperatures higher than 300°F.
Severe Pitting/Corrosion -Both Sides
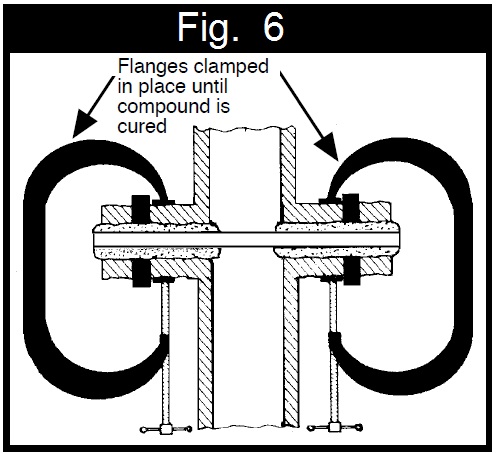
Flanges that are scored or pitted on both surfaces may be repaired in the following manner: (Fig.'s 5 & 6):
1) Abrade surface of pitted flanges by sanding, grinding, power-brushing, or grit blasting. Clean with Metal Prep II™ Degreaser.
2) Plug all bolt holes with corks, wooden plugs or putty.
3) Prepare a flat, smooth metal plate that extends beyond the diameter of the flanges to act as a mold for the new gasket surface. Coat this with ML900 Silicone Lubricant & Release Agent.
4) Coat both pitted flange surfaces with ML400 Machinable Repair™ at least 1/16" thick.
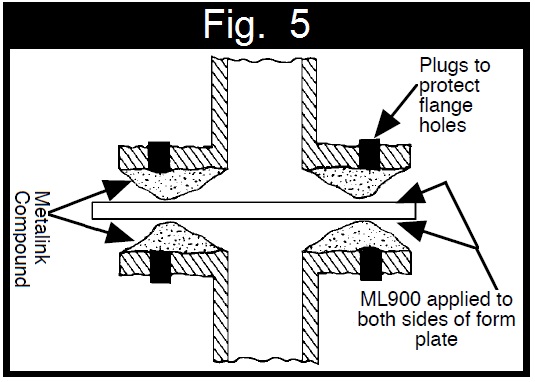
5) Install smooth metal plate between flanges, clamp together, wipe off excess material and allow curing fully.
6) Disassemble and clean/grind areas around bolt holes. Install new gasketing and return to service.
Note: This repair should not be attempted on flanges with operating temperatures higher than 300°F.
Comments
No posts found
